The (not so) good, the bad and the ugly
Let’s say that you are asked to do a Dark Background and a transparent navigation bar with white buttons and title.
SwiftUI comes packed with new features, a renewed air of simplicity and huge productivity boosts for developers. Yet, it still falls short on some aspects and to be fair, in most of the cases, UIKit had the same or similar pains.
It comes a time in a developer’s life when your next App’s design is both astonishing and nothing like the out-of-the-box components. SwiftUI helps a lot in that way but the Devil is in the details.
Your design is cristal clear (well, dark in this case)

So you to do something like this:
struct ContentView: View {
var body: some View {
NavigationView {
ZStack {
Color.black
NavigationLink(destination: Text("detail")) {
Text("push")
}
}
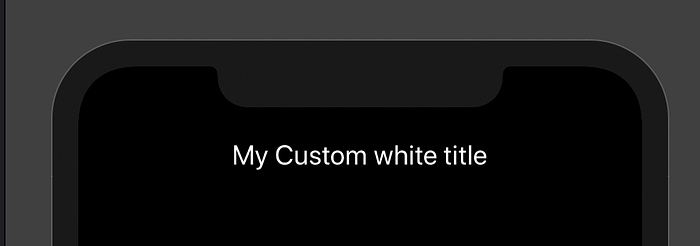
.navigationBarTitle(Text("My Custom white title")
.foregroundColor(.white)
.font(.title), displayMode: .inline)
}
}
}The API totally points you that way, but the result is this

Then the desperate googling starts
You find something like this as solution
struct ContentView: View {
     init() {
           UINavigationBar.appearance().tintColor = UIColor.white
           UINavigationBar.appearance().titleTextAttributes = [
               .font : UIFont.systemFont(ofSize: 20),
               NSAttributedString.Key.foregroundColor : UIColor.white
           ]
       }
but the result is somewhat misleading

Your background is not going behind the bar. so you add
Color.black.edgesIgnoringSafeArea([.all])and you get this

Close enough huh?
Well there are a couple of things you need to know:
You need to perform this changes on the root of your navigation stack
The order of the factor DOES alter the product
init() {
        // this is not the same as manipulating the proxy directly
        let appearance = UINavigationBarAppearance()

        // this overrides everything you have set up earlier.
        appearance.configureWithTransparentBackground()

        // this only applies to big titles
        appearance.largeTitleTextAttributes = [
            .font : UIFont.systemFont(ofSize: 20),
            NSAttributedString.Key.foregroundColor : UIColor.white
        ]
        // this only applies to small titles
        appearance.titleTextAttributes = [
            .font : UIFont.systemFont(ofSize: 20),
            NSAttributedString.Key.foregroundColor : UIColor.white
        ]

        //In the following two lines you make sure that you apply the style for good
        UINavigationBar.appearance().scrollEdgeAppearance = appearance
        UINavigationBar.appearance().standardAppearance = appearance

        // This property is not present on the UINavigationBarAppearance
        // object for some reason and you have to leave it til the end
        UINavigationBar.appearance().tintColor = .white

    }
EUREKA!!!!
Ok. Now we need to see what happens when you push this. So lets create another content view (ContentView2) and remove the title to ContenView
tl;dr: this is the final snippet
//
//  ContentView.swift
//  test
//
//  Created by Francisco Gindre on 1/3/20.
//  Copyright © 2020 Francisco Gindre. All rights reserved.
//import SwiftUIstruct ContentView: View {
    init() {
        // this is not the same as manipulating the proxy directly
        let appearance = UINavigationBarAppearance()

        // this overrides everything you have set up earlier.
        appearance.configureWithTransparentBackground()

        // this only applies to big titles
        appearance.largeTitleTextAttributes = [
            .font : UIFont.systemFont(ofSize: 20),
            NSAttributedString.Key.foregroundColor : UIColor.white
        ]
        // this only applies to small titles
        appearance.titleTextAttributes = [
            .font : UIFont.systemFont(ofSize: 20),
            NSAttributedString.Key.foregroundColor : UIColor.white
        ]

        //In the following two lines you make sure that you apply the style for good
        UINavigationBar.appearance().scrollEdgeAppearance = appearance
        UINavigationBar.appearance().standardAppearance = appearance

        // This property is not present on the UINavigationBarAppearance
        // object for some reason and you have to leave it til the end
        UINavigationBar.appearance().tintColor = .white

    }
    var body: some View {
        NavigationView {
            ZStack {
                Color.black
                    .edgesIgnoringSafeArea([.all])
                NavigationLink(destination: ContentView2()) {
                    Text("push")
                }
            }
            .navigationBarTitle("", displayMode: .inline)
            .navigationBarBackButtonHidden(true)
        }
    }
}struct ContentView_Previews: PreviewProvider {
    static var previews: some View {
        ContentView()
    }
}struct ContentView2: View {

    var body: some View {

            ZStack {
                Color.black
                    .edgesIgnoringSafeArea([.all])
                NavigationLink(destination: ContentView()) {
                    Text("push")
                }
            }
            .navigationBarTitle("My Custom White title", displayMode: .inline)

    }
}
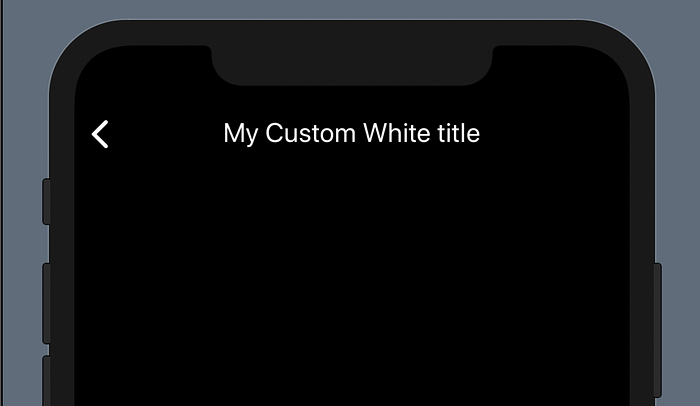
There we go!
Note: It’s January 2020. This is subject to change at any moment. I’m using Xcode 11.2.1 (11B53), because 11.3 renders your app useless when you navigate back and forth.